Generate layouts with AI
JitBlox's AI assistant lets you generate layouts using AI. Our AI assistant helps you generate a completely new app or page layout, but also helps you extend existing pages or components. JitBlox combines the power of AI with the ease of use of a visual, interactive environment. The main advantages:
- No code to deal with: many AI app builders generate code. This means that you still need to set up a development environment and maintain code. In JitBlox, you elaborate your design in a visual drag-and-drop environment (no worries, there's also a CSS editor for your advanced styling needs).
- A short feedback loop: you see a preview of all changes made with AI before you decide to apply them. And even then, you can always undo and redo them.
- High quality output: JitBlox generates the (downloadable) source code for your app itself. This code is well-organized, follows best practices and just works.
ℹ️ Our AI assistant is still in its beta phase. This means you may encounter behaviors that need refinement as we continue to improve the platform. We appreciate your feedback and patience while we work to make JitBlox AI even better.
The AI assistant is currently not available for Material Design projects.
Getting started
Our AI assistant can be accessed from various places in the JitBlox designer. When you start designing a completely new app, your starting point is the main layout, which opens by default when you open the designer. The following video shows how to generate the layout for a social networking app.
You may notice that the generated layout contains home page elements (with a main feed and suggested connections), as well as general elements that can be used on any other page. Learn how to easily separate the home page from its surrounding layout in the AI post-editing guide.
Generating pages and components with AI
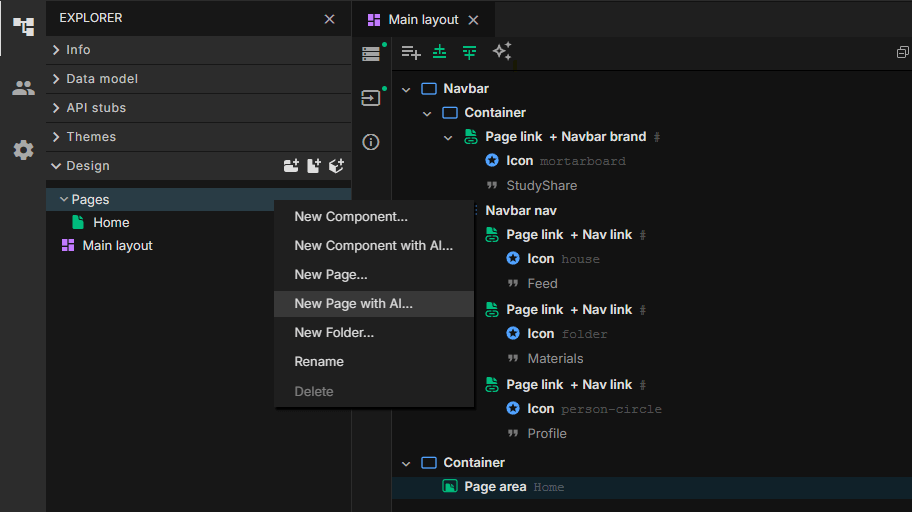
Ready to add more pages and components with AI? Easily a new Page or Component directly from the explorer pane.
Extending your Main Layout, Pages and Components with AI
You can also expand existing layouts using AI. You can do this simply by clicking the Insert with AI button above the template editor, or via the context menu of an existing element if you want to insert AI-generated content in a specific place.
Prompt guide: what to include in your prompts
Strong prompts are crucial when working with AI because they act like instructions for how the AI should think, interpret, and respond. A good prompt can mean the difference between a vague, unhelpful design and a clear, actionable, creative one. Furthermore, it's also good to understand that JitBlox automatically adds context to your prompts, such as the UI libraries used, your app's theme, global styles and - when generating new pages - your app's main layout.
When build a prompt for a new app, include the app type and purpose, its target users, its core features and its visual style. The following example structure may be a good starting point:
"A [app type] for [target users] to [main purpose]. Users can [key features]. The design style should be [style or mood, e.g., minimal, modern, playful, corporate]. [Optional:] Organize the layout using [grid system / navigation style]."
Do's for good prompts
- Be specific about the app type. "A finance dashboard" is more useful than "a web app".
- List the key features: tell the AI exactly what screens/components should exist.
- Define your users clearly: a kids' learning app vs. a corporate finance tool needs a very different look.
- Add constraints if needed: e.g. "mobile-first layout", "use only three colors", "cards-based design".
- Optimize your (AI generated) Main Layout before generating individual pages or components. This will result in pages and components that fit better into the overall look and feel (see the post-editing guide for a how-to).
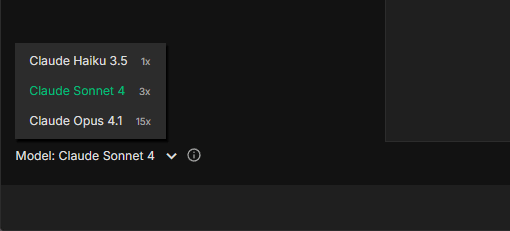
- Try more advanced AI models. Have you followed the aforementioned guidelines and you're still not happy with the results? Check whether you can achieve better results with a different AI model.
What to avoid
- Don't mention UI libraries. The generated layout automatically uses the libraries you selected when creating your JitBlox project. However, feel free to specify your preferred components!
- Don't mention a theme (like "the app should use a dark theme"). Instead, set the base theme of your app in advance.
- Don't provide technical specifications: e.g. "Integrate with Stripe API, use PostgreSQL database, and implement OAuth authentication with Google and Facebook."
- Don't ask for logic: e.g. "Clicking the Save button should save the form data to ...". Our AI assistant currently generates layouts only.
Example prompts
1. Dashboard App
"A responsive project management app for software teams to track their work items. Users can see their active and planned work items as well as the most recent high-priority issues. It should include a sidebar with navigation, a top bar with search and profile settings, a main content area with project cards, and a right-hand panel for notifications. Use a clean, modern style."
2. E-commerce Store
"A layout for a clothing e-commerce site. It should include a home page with product grid, a top navigation bar with logo, search, and cart, a sidebar filter menu, and a product detail page with image gallery and add-to-cart button. Use a clean, modern style."
3. Social Networking App
"A layout for a social networking web app. It should include a left sidebar with navigation, a central feed with posts, a right-hand panel with suggested connections, and a top navigation bar with logo, search, and profile menu. The design should feel friendly and engaging, using a card-based layout."
Post-editing guide
So you've just created your first layout based on a carefully designed prompt. What's next? You may want to refine the generated layout using our drag-and-drop designer, or customize some of the AI-generated styles. We recommend reading our getting started guide to understand the core concepts of JitBlox. Specifically for AI-generated layouts, we recommend the following steps to take your app to the next level.
Separate the first page from the main layout
When you have just generated a new app, you will most likely recognize a full page (a home page, a dashboard) in your Main Layout consisting of some common parts that you would use on every page (like a header, footer or sidebar), and the remaining page content. Here is an example of a page with a fixed header and side navigation:
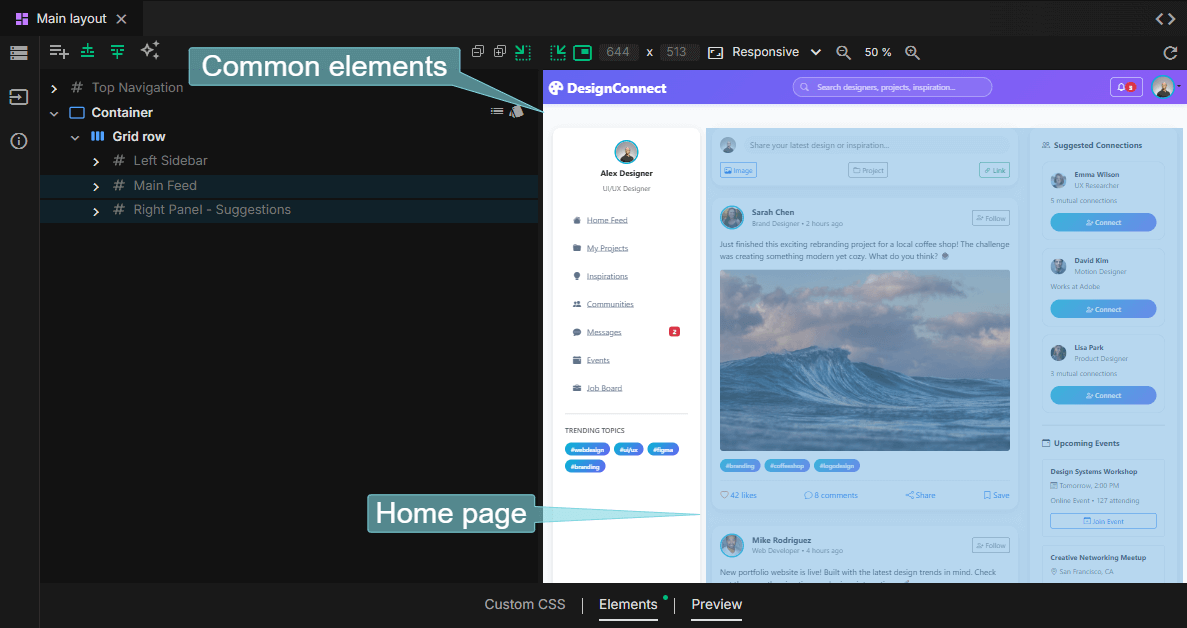
For the maintainability of your app and for good AI results when extending your app, it is important to separate the actual page content from the fixed elements. You can achieve this with a quick and simple action: locate the element that contains the page contents (a Grid row in the above example) and select Convert To Page from the context menu:
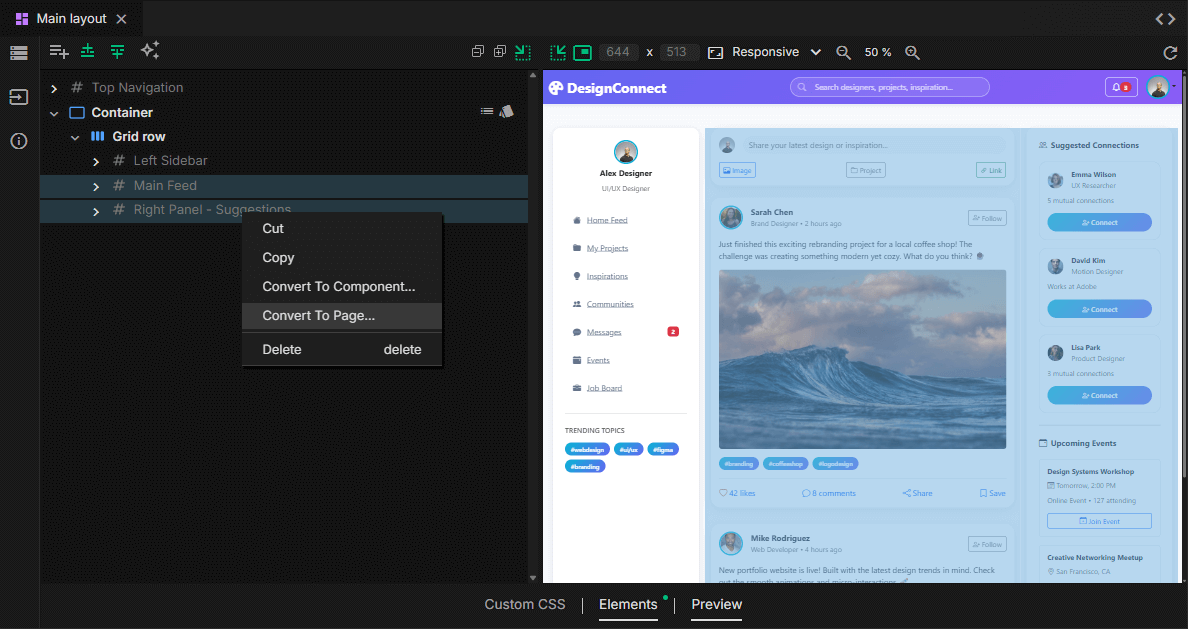
This will move the selected content to a new Page with a name you specify and replace it with a Page Area (1). Right now, your app has an AI-generated Main Layout, an initial AI-generated Page, and you're all set to add more pages to your app!
Add in-app navigation
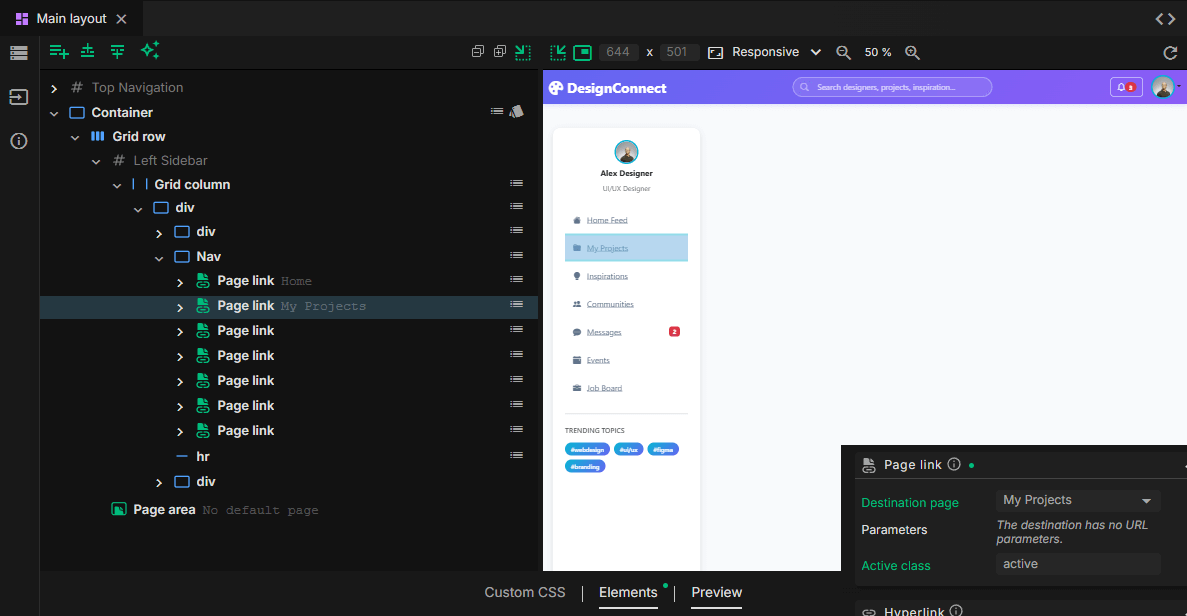
As you add new pages to your app, you naturally want users to be able to navigate to them. For in-app navigation, you use Page Links in JitBlox to navigate to other pages. In AI-generated navigation layouts, Page Links are often automatically inserted for you, but you also easily add your own (1). After you have created the corresponding page, you only need to make sure that the page link refers to the correct page by setting its Destination page property.
Componentize your layouts
You will notice that some elements in an AI-generated layout are very similar: they have the exact same layout, only the information differs. See, for example, the following AI-generated finance dashboard:
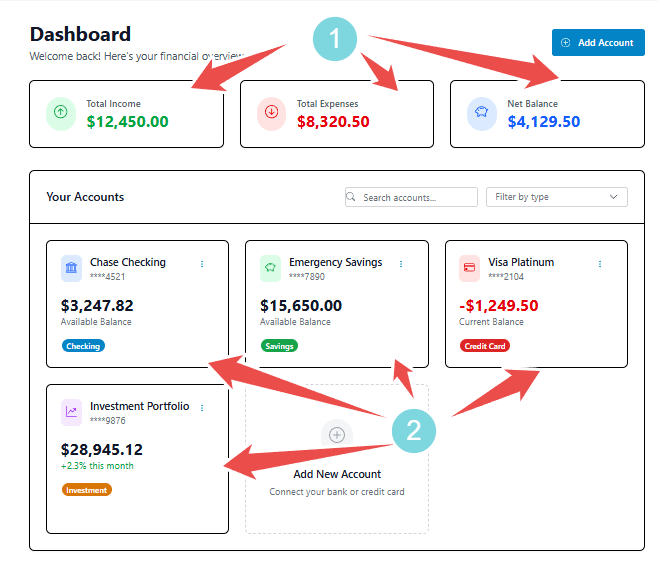
In a maintainable app, you want to create just one reusable component (2) for both the top three blocks and the bottom four, which you can then repeat a number of times. This ensures that you only have to make changes to the layout in one place. This article provides a good explanation of how to easily split an existing layout into reusable components (the article refers to Tailwind, but is generally applicable - you may skip the first three sections).
Fix broken images
Sometimes AI-generated content contains images that do not exist (for example, because the image in question no longer exists). This results in broken images in your design. There are two possible fixes for this:
- Try correcting the image source URL or find another image on a stock photo or placeholder image site.
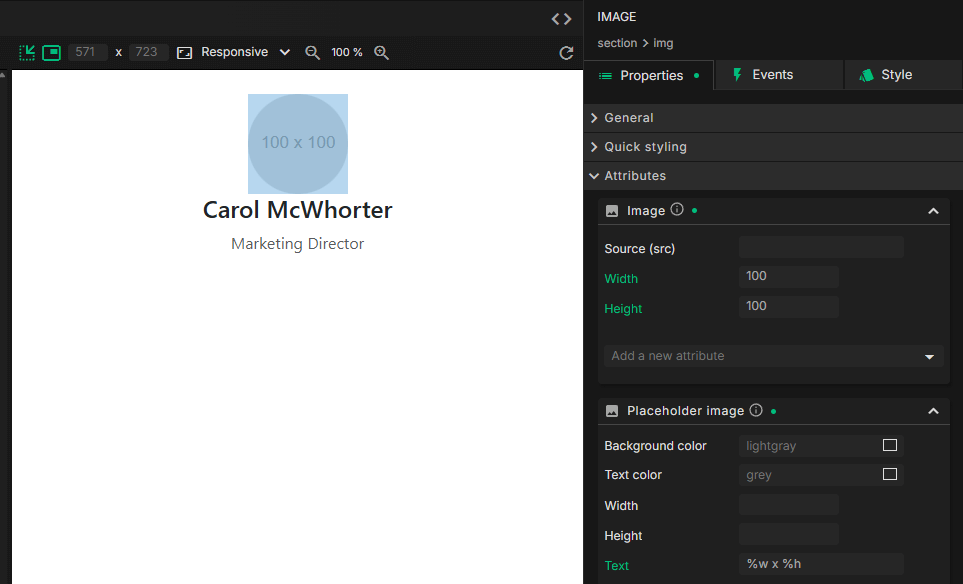
- Clear the image source URL to enable the built-in placeholder image. Every image in JitBlox has this feature, which is automatically enabled when an image source URL is not set.
1) A Page Area displays the content of the page to which the user navigates. A Page Link is a special navigation link that opens a Page in the Page Area. Read more about implementing in-app navigation in the navigation section
2) If you're not familiar with component-based applications, you might want to read our intro to component-based apps.
About AI credits
In JitBlox, you receive AI credits for running AI prompts. Our AI assistant always displays exactly how many credits you have used in your current chat, and your account page always shows how many credits you have used in total and how many free credits you still have left.
The number of credits you use per chat depends on the AI model you choose: more advanced AI models use more credits. That is why you will see a so-called consumption rate behind each AI model in the AI assistant. Read more about AI credits and consumption rates on our plans and pricing page.
